Warning: Array to string conversion in /home/usmdlorg/public_html/wp-content/plugins/magee-shortcodes/Includes/Classes/Helper.class.php on line 305
If students will be adding blog posts or authoring pages in your WordPress site, you’ll need to add them as users. Users have to be added one at a time to your WordPress site, but the process is fairly simple.
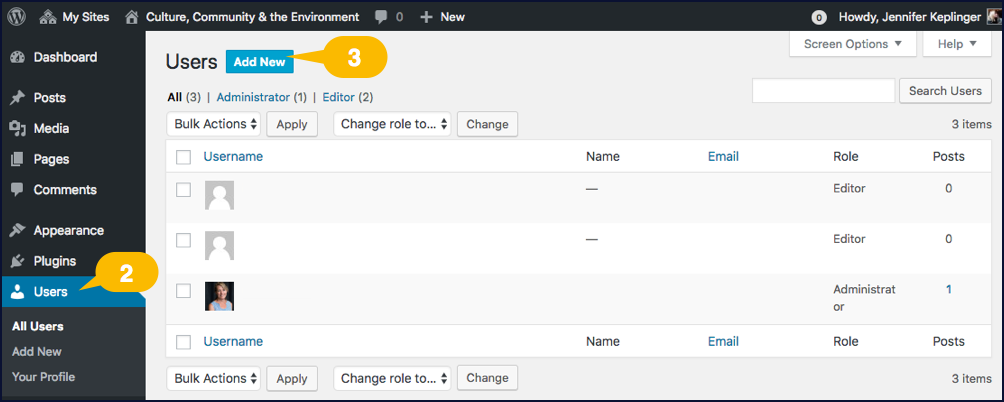
- Go to the dashboard for your WordPress site.
- Click the Users link in the left-hand menu. A list of people who currently have access to your site will be displayed.
- Click the Add New button. It’s just to the right of the “Users” heading on the top-left side of the page. The “Add New User” page will open; it has two sections: 1) “Add Existing User,” which is on the top half of the page; and 2) “Add New User,” which is on the bottom half of the page. In this case, “new” user means someone who doesn’t already have access to CTEL’s WordPress network, so all of your students will likely be new users rather than existing ones.
- Enter a username for the student. It can’t have spaces or punctuation.
- Enter the student’s email address.
- Select a level of access on the Role menu. We recommend the Author option if students will only be writing blog posts or the Editor option if they’ll be editing or adding pages.
- Leave the “Skip Confirmation Email” box unchecked. Students will need to receive a confirmation email from WordPress since it has a link to the site’s login page and a temporary password.
- Click the Add New User button at the bottom of the page. The user account will now be created for the student.