Warning: Array to string conversion in /home/usmdlorg/public_html/wp-content/plugins/magee-shortcodes/Includes/Classes/Helper.class.php on line 305
“Content areas” and “content folders” are effectively the same thing in Blackboard. The main difference is that content areas appear as links in your course menu and are created in the course menu’s options, but content folders do not appear in the course menu are created within a content area. Yes, it’s silly. Blame Blackboard.
- Navigate to the content area or content folder in which you want to add your file.
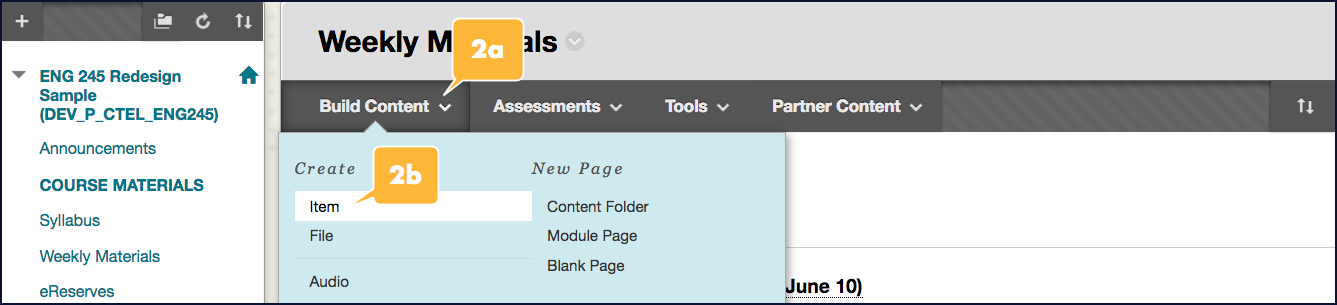
- Hover over the (a) Build Content menu button so that its dropdown menu opens, then select (b) Item.
- Enter a name for the file you’re adding in the “Name” textbox, e.g., “Course Schedule.”
- Enter information about the file in the “Text” textbox. If your file doesn’t have more than a page of text, copy and paste it into this textbox. Although this might seem redundant since you’re also attaching the file itself, it allows students to simply read your file’s text directly in Blackboard without having to download the file.
- Click the Browse My Computer button in the “Attachments” section.
- Select the file on your computer.
- Click the Submit button.
NOTE
Avoid using the File option in the “Build Content” menu. It doesn’t allow you to enter a description, and your file will not be viewable on some students’ computers. The method presented here allows your file to be compatible and accessible for everyone.